Setting up your Mac to connect to My Private Network should take 5 minutes with these simple step-by-step instructions.
Note: This assumes that you are using a fairly recent version of OS X i.e 10.4 and above.
Remember, you need an existing internet connection to connect to My Private Network. Make sure your Mac is connected to the internet and that you are able to browse the web.
To check your location, please go to our IP Info page, or alternatively go to our homepage and scroll down to this section:

This shows the IP Address and country that you are currently connecting from. In this example, the user is connecting from Singapore.
Step 1: Download Tunnelblick
Tunnelblick is an open source software tool for MacOS that is used to connect to our servers via the SSL OpenVPN connection.
Please download the Tunnelblick installer from the link below and save it on your Desktop.
Download Tunneblick
Step 2: Download Configuration File(s)
Please choose your configuration from the table .ovpn below, click on Download and save it on your Desktop, i.e. if you have a USA subscription, click on the USA download link.
Note: If you're having problems downloading, use CTRL+Click on the link (i.e. hold down the CTRL key whilst clicking on the link) and choose Save/Download Linked File As to the Desktop.
| Country | 3 Letter Code (ISO/UN) | Server Name | Tunnelblick Config File | |
|---|---|---|---|---|
 | Global | Global | - | Download |
 | Free | Free | fre.mypn.co | Download |
 | United Kingdom | GBR | gbr.mypn.co | Download |
 | United States | USA | usa.mypn.co | Download |
 | Argentina | ARG | arg.mypn.co | Download |
 | Australia | AUS | aus.mypn.co | Download |
 | Austria | AUT | aut.mypn.co | Download |
 | Belgium | BEL | bel.mypn.co | Download |
 | Brazil | BRA | bra.mypn.co | Download |
 | Canada | CAN | can.mypn.co | Download |
 | Czech Republic | CZE | cze.mypn.co | Download |
 | Denmark | DNK | dnk.mypn.co | Download |
 | Egypt | EGY | egy.mypn.co | Download |
 | Estonia | EST | est.mypn.co | Download |
 | Finland | FIN | fin.mypn.co | Download |
 | France | FRA | fra.mypn.co | Download |
 | Germany | DEU | deu.mypn.co | Download |
 | Hong Kong | HKG | hkg.mypn.co | Download |
 | Hungary | HUN | hun.mypn.co | Download |
 | Iceland | ISL | isl.mypn.co | Download |
 | India | IND | ind.mypn.co | Download |
 | Indonesia | IDN | idn.mypn.co | Download |
 | Ireland | IRL | irl.mypn.co | Download |
 | Israel | ISR | isr.mypn.co | Download |
 | Italy | ITA | ita.mypn.co | Download |
 | Japan | JPN | jpn.mypn.co | Download |
 | Luxembourg | LUX | lux.mypn.co | Download |
 | Malaysia | MYS | mys.mypn.co | Download |
 | Mexico | MEX | mex.mypn.co | Download |
 | Netherlands | NLD | nld.mypn.co | Download |
 | New Zealand | NZL | nzl.mypn.co | Download |
 | Norway | NOR | nor.mypn.co | Download |
 | Pakistan | PAK | pak.mypn.co | Download |
 | Philippines | PHL | phl.mypn.co | Download |
 | Poland | POL | pol.mypn.co | Download |
 | Portugal | POR | por.mypn.co | Download |
 | Romania | ROU | rou.mypn.co | Download |
 | Russia | RUS | rus.mypn.co | Download |
 | Saudi Arabia | SAU | sau.mypn.co | Download |
 | Singapore | SGP | sgp.mypn.co | Download |
 | South Africa | ZAF | zaf.mypn.co | Download |
 | Spain | ESP | esp.mypn.co | Download |
 | Sweden | SWE | swe.mypn.co | Download |
 | Switzerland | CHE | che.mypn.co | Download |
 | Taiwan | TWN | twn.mypn.co | Download |
 | Ukraine | UKR | ukr.mypn.co | Download |
Step 3: Installing Tunnelblick
Now that you've downloaded both Tunnelblick and the configuration file(s), you need to install the Tunnelblick first into your system. To do so,
- Locate the Installer .dmg (i.e Tunnelblick 3.6.4a.dmg) image file in the location you've downloaded it to (i.e. Desktop, Downloads).
- Double click on the file and Finder will show a new window. Next, double click the Tunnelblick icon (as shown in the image below)
Note: If Finder doesn't show the new window, please navigate manually by selecting the Go menu on your Finder menu bar and choose Computer or Home. You should now be able to find the Tunnelblick image mounted under Devices at left panel of the Finder window.

When you see the security warning, select Open.

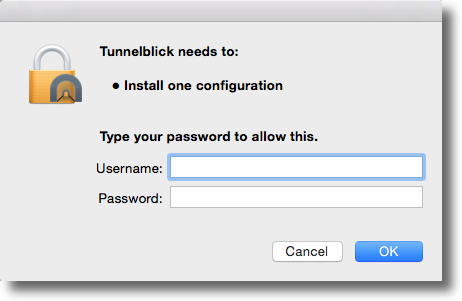
Authentication Note: Tunnelblick needs special permission to install. When prompted, please confirm your local computer password (this is the Administration password on your Mac and not related to your account with us).

Once the Tunnelblick application Installation succeeded, you will be able to see a notification popped up at the top right of your taskbar.

Note: If you are getting any errors or having problems with installing Tunnelblick, please ensure any older version of Tunnelblick is removed from your system following the steps in our article, Uninstalling Tunneblick from your Mac OS X.
At this point, if any new update is released, Tunnelblick will prompt you automatically. Just proceed with the on-screen instructions and you may need to enter your local computer password to install the updates. At the New Feature screen, select on Check for a change.

Select Check Automatically for Tunnelblick to check updates automatically.

At the Welcome screen, select I have configuration files.

Next, select on OK at the Add a Configuration window.

You should now see the Tunnelblick icon in the top right corner of your Mac menu bar, although it will be greyed out as you have not yet connected to us.

Step 4: Installing Configuration File(s)
Next, double click on the configuration file(s) that you’ve downloaded earlier (i.e. MPN USA.ovpn). The file should be saved on your Desktop or Downloads folder.
Note: The options here depend on which configuration file(s) you installed in Step 2.

Important: If you’ve downloaded our Global configuration OR the configuration file is not responding when you double clicked on it, please ensure that Tunnelblick application is closed. If you can see the Tunnelblick icon at the top right hand corner of your taskbar, click on it, choose Quit Tunnelblick and try to install the configuration file again.

You can either choose to install the configuration for All Users which you’ve set up on your computer or select Only Me.

Note: If you’re trying to install our Global configuration, you should have an additional option called Apply to all. Please tick on it.
It will now prompt you to enter your local computer’s credentials again, this is the administration Username and Password on your Mac and not related to your account with us and select OK.
Once the Tunnelblick configuration Installation succeeded, you will be able to see a notification popped up at the top right of your taskbar.

Step 5: Connect to our VPN server
Click on the Tunnelblick icon at your menu bar and select Connect MPN USA for US connections or whichever country you wish to connect to.
Note: the options here depend on which configuration file(s) you installed in Step 2.

You will now be asked for your VPN username and password, these are the same details that you registered with My Private Network. Enter them and click OK.
Note: Your username is your unique name created under your account with us and NOT your email address.

After a few moments, the Tunnelblick icon should appear 'dark lit' and this indicates that the VPN is connected.

If for any reason, the icon stays grey, click on it again and choose show VPN details. You can then see the reason it failed at the Log button and if necessary, please send the log to our support desk for assistance.
Step 6: Check Connection
Browse to our homepage, and the IP indicator should show that you are now in the country that you chose. You may also go to our IP Info page to check.

Note: the server IP address and country name will vary depending on the server or country you are connected to.
Other Locations
Note: To connect to other countries, you must either have subscribed to our Global Plan or the plan for that particular country.
Any Problems?
Unfortunately it doesn't always go to plan!
If you have any problems or can't get connected, please email us at support@my-private-network.co.uk. We'll get back to you as soon as possible and try to help.